
:


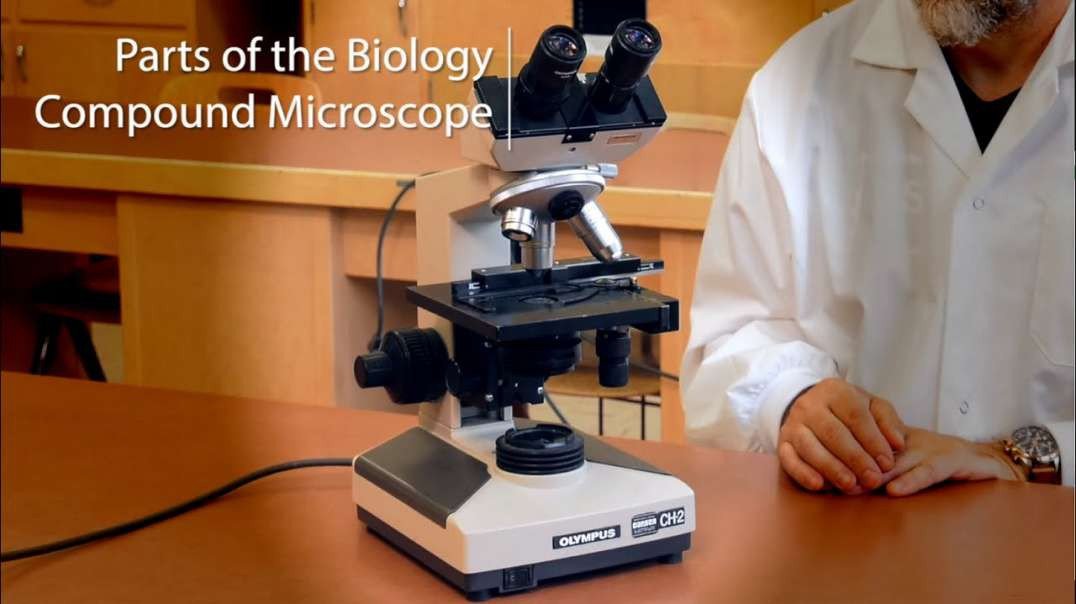
Light Microscope Parts and Functions in Detail
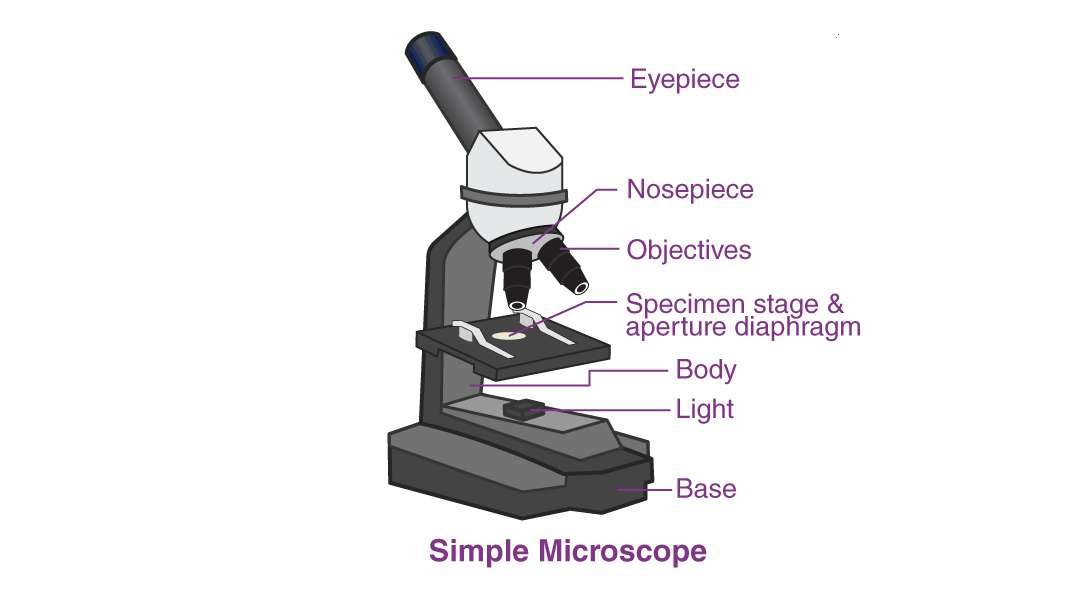
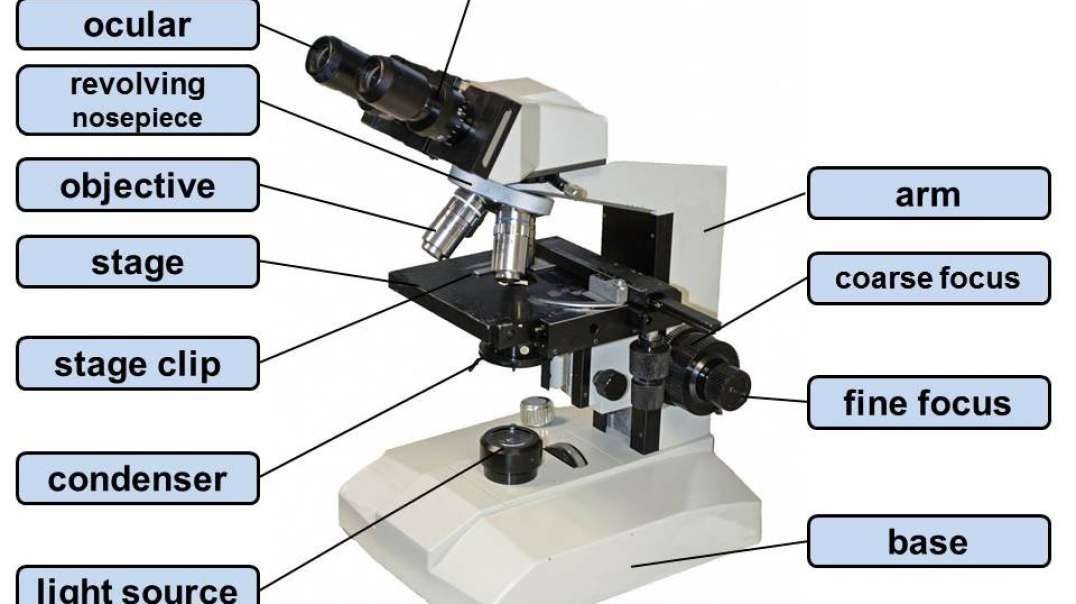
1. Eyepiece (Ocular) - This is the part of the microscope that is the closest to the eye to which you look. It contains the ocular lens which makes the image produced by the objective lenses larger. An eyepiece may be labeled with its magnification or parfocal lens for example 5x or 10x.
2. Body Tube - The body tube holds the eyepiece in position over the revolving nose piece and the objectives. The body tube maybe straight up and down or slanted.
3. Arm - The arm is the curved metal piece that holds the body tube in place over the stage and the base.
4. Revolving nose piece - The revolving nose piece holds the objectives and allows you to change objectives while looking at a slide or sample.
5. Objectives - The objectives are the parts at the bottom of the body tube, closest to the sample you are examining. Each objective has a lens and a tube-like holder remount. The longer mounts hold stronger lenses or high-power lenses. The shorter mounts hold the weaker lens or low-power lenses. Like the eyepiece objectives also come in the various parfocal lenses, microscopes have several objectives for example is 4x, 5x, 10x, 45x, 100x. Some microscopes only have one or two objectives.
6. Stage - The stage is a flat surface on which you put your slides or samples.
7. Stage Clips - The stage clips hold the slide in place on the stage.
8. Condenser - Beneath the stage some microscopes have a condenser having a standard diameter of 39.5 mm which collects and concentrates the light before it passes through the sample.
9. Iris Diaphragm - The iris diaphragm is used to control the diameter of the cone angle of the light transmitted onto the specimen.
10. Coarse Adjustment Knob - The coarse adjustment knob is the large knob used to adjust the position of the body tube allowing you to quickly bring your sample slide into view.
11. Fine Adjustment Knob - The fine adjustment knob is the small knob used to change the position of the body tube by making small adjustments to the focus of your sample. Almost all microscopes have two knobs but some have only one knob.
12. Mirror - The mirror is located beneath the stage diaphragm increasing the amount of light shining through your sample or slide. Sometimes the mirror is replaced with lamps that are plugged into an electrical outlet instead of a mirror or reflector.
13. Base - The base of the microscope is the heavy bottom part, it supports all the other parts of the microscope.
14. Sub-stage Adjustment Knob = Sub-stage adjustment knob is used to move the condenser up and down.
How to set up the microscope
A.
1. Remove the cover of the microscope.
2. Always lift the microscope correctly. Grasp it firmly with two hands, one hand under the base and another on the arm.
3. Place the microscope on a table away from the edge.
4. Move the microscope to a position in which you can look comfortably through the eyepiece. You may need to sit on a chair or stool
B.
1. Make sure the low power objective is in place over the hole in the stage.
2. Use the coarse adjustment knob to raise the objective so that its lowest bend is about 1 inch/2.5 centimeter above the stage.
C.
1. Put the slide on the stage so that the center, the bit you want to look at is over the hole and under the lens.
2. Use the stage clips to hold the slide in place.
D.
1. Look through the microscope, you should see a circle of light against the black background
2. Twist the concave mirror around to make the circle as bright and even as possible.
3. If you cannot see a circle of light your objective lens is probably not in line with your ocular tube or the eyepiece.
4. Adjust the nose piece until you hear the lens click into place.
E.
1. The reflector has one side that is flat while the other is concave. It is difficult to say which one is best to use in every. You will have to experiment to see which give you a better view. The flat side will provide a sharper image in most cases. The curved side will provide a brighter image.
Note:
Never use the microscope in direct sunlight as the reflected light may damage your eyes.
F.
1. If you are using a lamp for your lighting, put it about 20 centimeters away from the microscope.
2. Adjust the lamp so that the light points towards the mirror under the stage.
G.
We have already told you in step two that low power objective is in place over the hole in the stage
1. Look through the eyepiece and use the coarse adjustment knob to focus upwards or move away from the sample or slide. This should bring the slide or sample into view.
2. If you go too far simply begin again at step 2.
H.
When the specimen's light comes into focus it will become sharp and clear.
I.
To use the high power objective turn the revolving nosepiece to bring it into position over your samples or slide. You should be able to see the sample or slide through the high power objective so you only have you adjust the fine adjustment knob.
J.
1. Now adjust the aperture control with the help of the diaphragm, close it until the circle of light dims and then open it again slightly and stop it where you get the maximum resolution of the slide or sample in view.
K.
Medical microscopes have a special type of lens called an oil immersion lens 100x.
1. This lens is used by placing a drop of oil so that the oil is on top of the coverslip.
2. Adjust the position of the front lens of the objective so that it is touching the oil drop.
The oil bend light more than the air would so more light can enter the microscope. All immersion lenses make it easier to see samples because they increase the amount of light going through the sample or slide and microscope and into your eyes.